Working with Samples
Samples are little bits of audio that can be loaded in the app, assigned to keys of the piano and played when certain notes of the piano are triggered.
They are well suited for percussion and sampled instruments in general, but they were not designed for things like vocals in mind. Vocal/audio tracks will be coming in future version.
That being said, as of version 1.x, samples are the only way to load external audio in the app.
The general sample workflow is:
- Import samples in an instrument and optionally set their target formats.
- Create a generator that supports the format of sample you are targeting.
- Edit the Sample Map of that generator and assigned the samples to keys of the piano.
- Add notes in the piano roll to play those samples.
Generators that support samples will have a Sample Map that can be edited. These generator will usually support one of more sample formats. Samples have a "Source Format", the format of the file you imported, and a "Target Format" that can be set. The app will perform any required conversion when setting the Target Format. Some formats, notably the ones related to retro gaming hardware, will incur a quality loss during conversion.
Some generators will allow you to use a sample over multiple notes of the piano, automatically shifting the pitch relative to the root note as needed. This is similar to what SoundFonts do and allows you to cover a large range of the piano with just a handful of samples.
Here is the current list of sample generators, the format(s) they support and if they support pitch-shifting:
| Generator | Format(s) | Pitch-Shifting |
|---|---|---|
| Generic PCM Sampler | PCM (32-Bit Float) | Yes |
| NES 1-Bit DPCM | DPCM (1-Bit) | No |
| NES 7-bit PCM | PCM (7-Bit) | Yes, may sound out of tune |
| YM2610 Sample | ADPCM A or B | No |
The 32-Bit PCM sample format also supports setting a loop point on samples, allowing you to artificially extend samples similar to what SoundFonts so.
Importing Samples
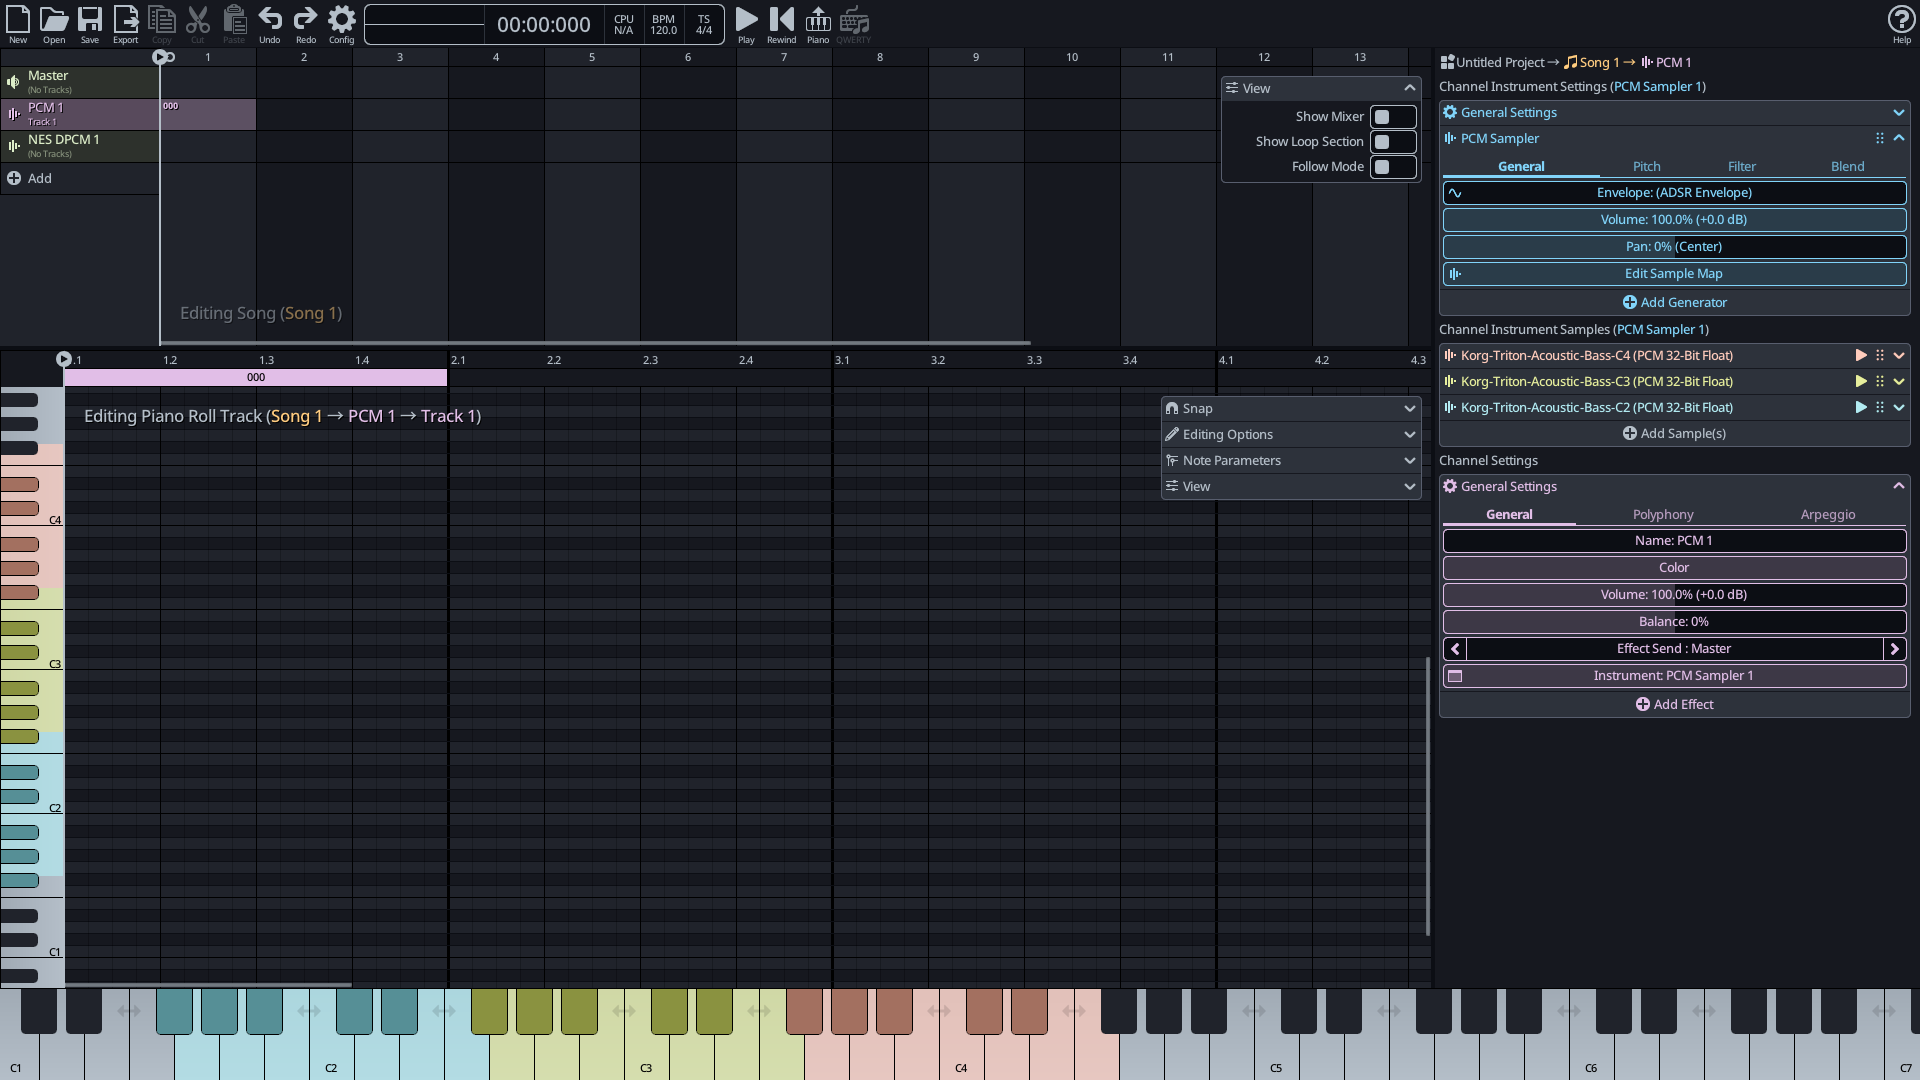
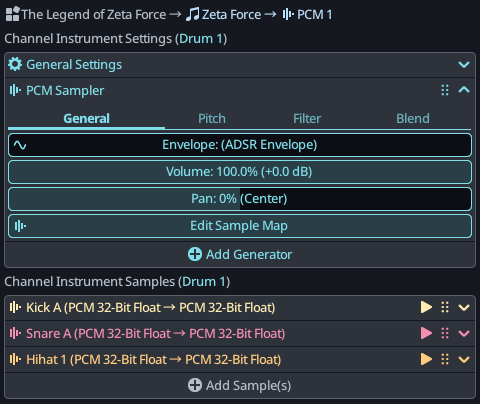
Samples exists as part of an instrument, and are used by its generator(s). Navigate the Project Explorer to an instrument, by either going to that instrument directly, or clicking a channel using this instrument. The list of sample will be located below the list of generators. Samples can be previewed by pressing the little "Play" button next to their name.
Please note that in version 1.0, samples were at the project level. This was changed in 1.1 to moved them on the instrument to make instrument sharing easier. Older projects are automatically migrated.
To import a new sample, simply press the (+) Add Sample(s) button and choose the file(s) to import. Alternatively, on desktop, you can simply drag files on the KiraStudio window to load them on the currently selected instrument.
The app currently supports the following file formats:
- Wave files (.wav)
- 1-Bit DPCM Samples (.dmc)
- ADPCM-A Samples (.rom)
Sample Parameters
Samples have a few high-level parameters than can be edited directly in the Project Explorer by expanding their button.
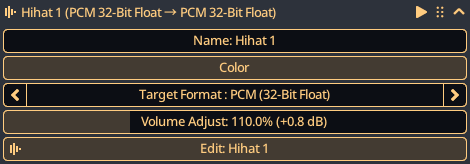
Besides their name and color, you can change the Target Format and perform minor volume adjustments. For more in-depth editing, pressing the Edit button will open the Sample Editor.
Sample Editor
The Sample Editor allows to perform light editing of samples such as minor volume adjustment, pitch shifting, trimming and setting loop points. It is not a full fledged audio editor like Audacity. That being said, its capabilities will hopefully grow in the future.
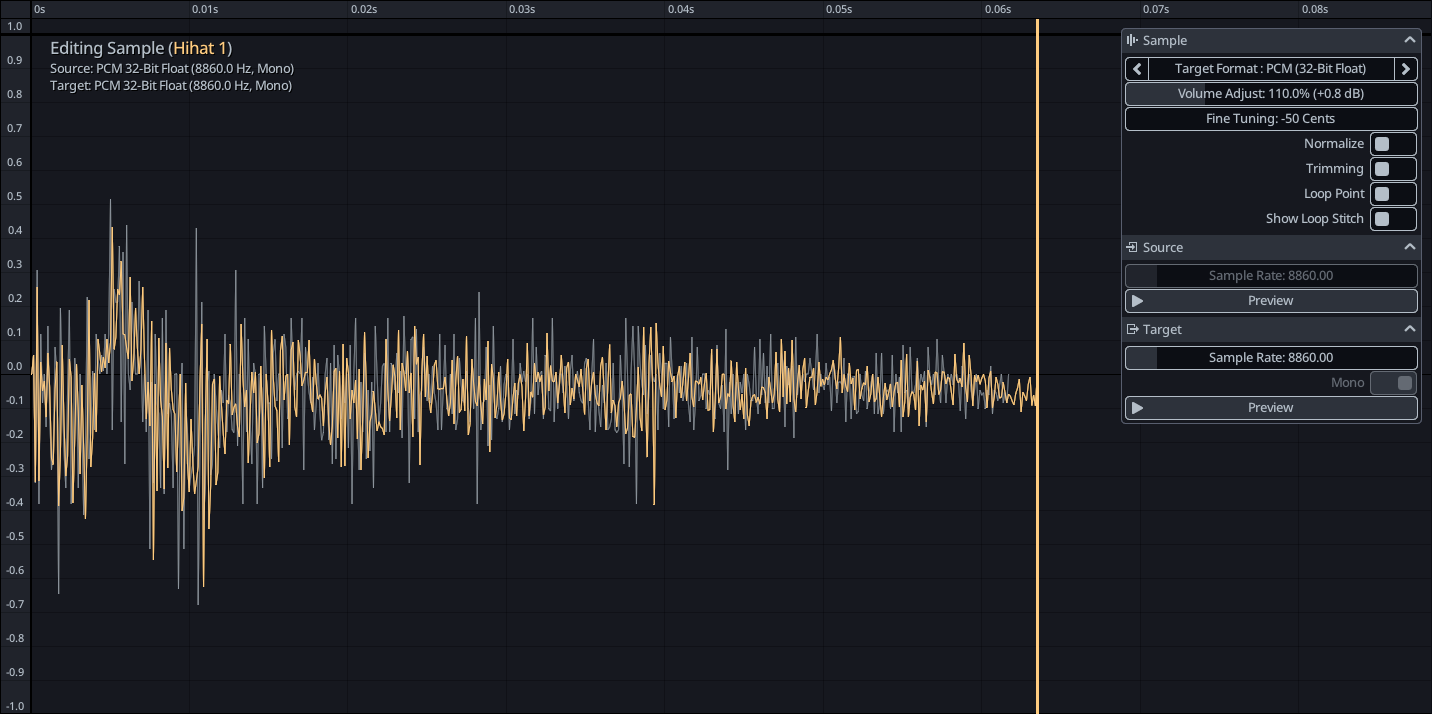
The sample workflow in KiraStudio is lossless in the sense that the source sample is always left unmodified and any parameter you change simply regenerates the target sample. The target sample is the sample you will ultimately hear in your song.
When modifications are made, the source sample will appear gray, and the target sample will be colored. In the screenshot above, the user pitched down the sample by 50 cents, and the target sample now appears out of sync with the source sample.
The floating toolbar on the left contains a few of the same parameters present in the Project Explorer, notably the Target Format and volume adjustment, but it also adds a few more.
- Fine Tuning : Simple fine tuning adjustment, in cents, for more substantial adjustment, an external app is recommended.
- Normalize : Adjust the overall volume of the sample based on the detected peak amplitude.
- Trimming : Enabled trimming of the sample, useful to remove unused parts
- Loop Point : Enables loop point, only available on certain target formats.
- Show Loop Stitch : When enabled, a close-up of the loop stitch will be displayed to help make the looping section seamless.
Below these parameters will be format-specific setting for the source/target format.
Samples can be trimmed to remove undesired parts. Additionally, some sample formats will allow setting a loop point. This is similar to what you would find in a SoundFont editor.
In the example below, the C5 note of a violin is trimmed to only keep the attack and a loop point is set so that it keeps playing the sustained part indefinitely. Notice the close-up of the stitch in the bottom left corner. When trimming is enabled, the looping section is between the loop point and the end trim point, otherwise between the loop point and the end of the sample.
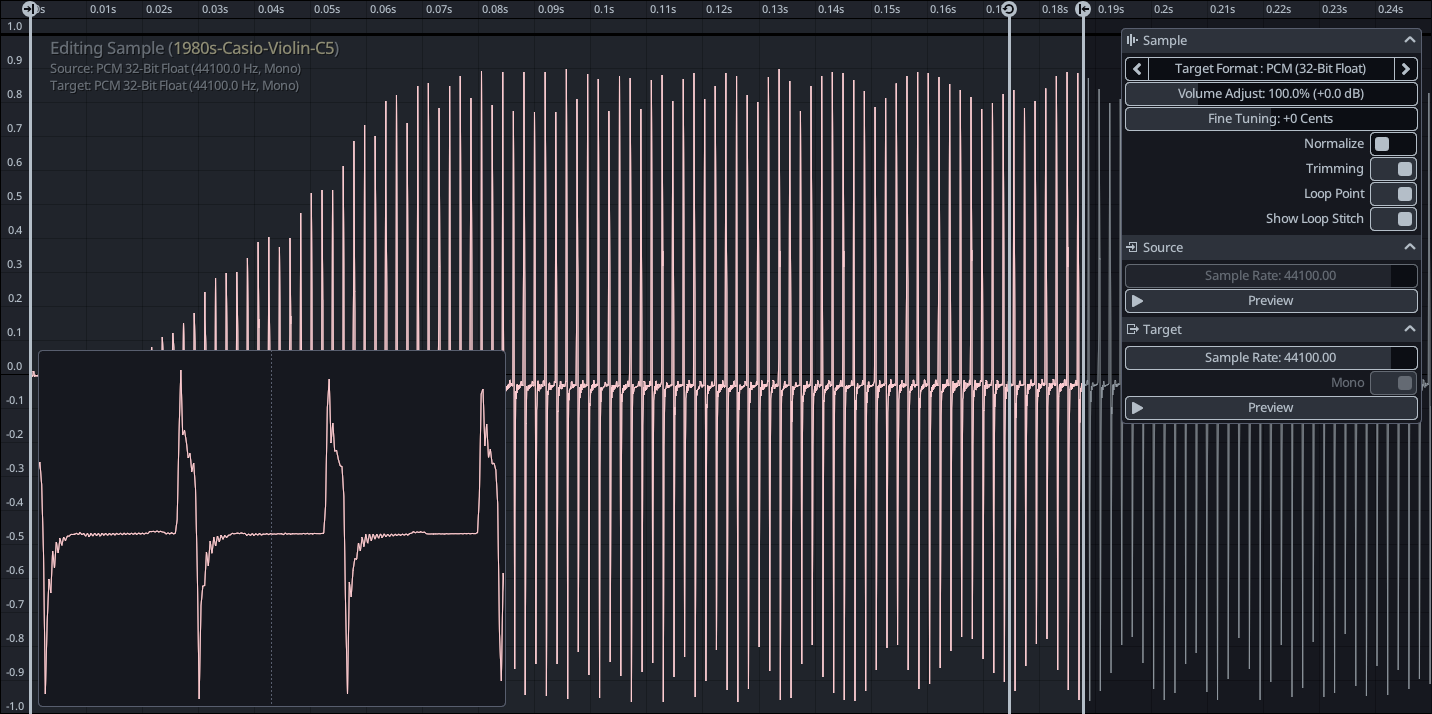
Note that the preview buttons in the Sample Editor do not preview the actual looping part, just the raw sample. To hear the proper loop in context, you should play the instrument itself with pop-up piano or MIDI controller.
Sample Map Editor
Once you have some samples loaded, the final step is to assign them to keys of the piano via a Sample Map. The sample map editor can be opened by pressing the "Edit Sample Map..." button any generator that supports samples.
The sample map editor is pretty straightforward. The floating toolbar on the top right allows you to pick a sample, and clicking anywhere on a free space in the background will assign that sample to the corresponding piano key. Just like the other editors, you can drag things to move them, make a selection with right click, delete things, etc.
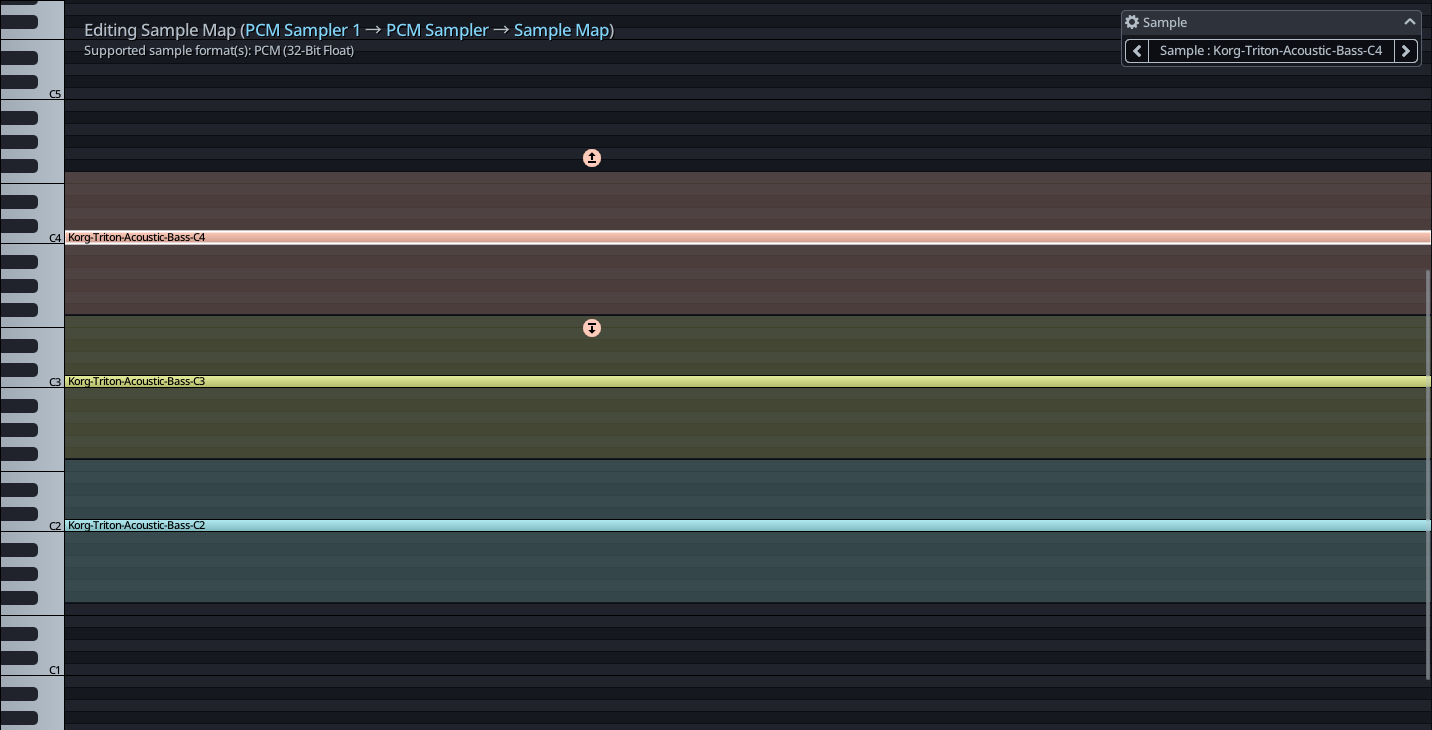
Some generators, notably the PCM sampler will allow you to extend samples over a range of notes and handle the pitch-shifting from the root note automatically. Simply click on a sample, and drag the 2 round arrow to set the low/high range that the sample should cover. In the example above, 3 octaves of bass are covered with only 3 samples.
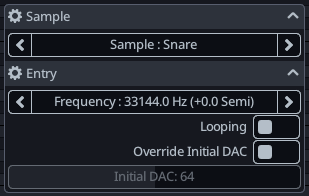
Some sample types, such as 1-Bit DPCM, will have some extra property on each entry in the map. These will provide additional information to the generator that will use them and can be modified for the selected entry/entries.
Finally, when samples are correctly assigned, the keys of the piano, both in the piano roll and the pop-up piano, will be tinted by the color of the samples as an extra visual cue to show where the valid notes are.